Today we are going to talk about how to repair an Airless paint sprayer. Small damages and common problems on airless electric piston devices often have an easy solution.
On this occasion we are going to use Graco MArk VII Airless paint sprayer as an example, for the problems that we are going to talk about are applicable for all electric piston pump equipment, since they are all very similar in function and operation.
We recommend that, before you start to repair any small damages or common problem, you always have the manual of your airless paint sprayer handy. Since with this help it will be easier when you have to take apart any of the parts, so you will be able to see all the parts of the device and where they belong. On these next links you will be able to find manuals for Graco parts and Wagner parts on our online website.
For an in-depth article for all repairs done in the video above, check out this article here
The equipment will not turn on
One of the main problems we get asked about is, the device simply does not turn on.
This problem could sound worrying but the reason might actually be very simple:
- The cable is damaged: if your machine has been used for years, it is very common that the cable is old and could be damaged and the electricity is not reaching the device. This is the first thing that you should check.
- The fuse is blown.
- One of the most common problems to happen is that the equipment is on but the pressure level is on minimun, so it looks like the device is off or not working, just check your pressure control.
- If your device is not working, it is also recommendable to check the digital screen of the machine, there may be a damage message there, an electric system damage or a message informing that the pump is overloaded. In this case you would have a message on the screen.
The next category of problems we are going to talk about is:
The device is on but it doesn’t suck
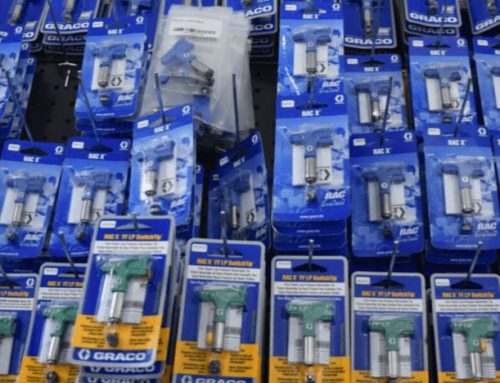
One of the reasons could be that the machine is overloaded, it has too much material in it. For example one or more of the different filters or even the nozzles are obstructed with material. The possible points of obstruction would be:
- The suction filter
- The main filter
- The gun filter
- The nozzle has a paint jam
This may be the reason why the device doesn’t work, the motor runs but it does not pump. What can we do? Check that the filters and nozzles are clean, and if they are letting the material flow. Best thing to do is to remove and clean them or if they are damaged replace them.
If your machine is not sucking, another possible solution could be to check the position that the pressure valve is in. The pressure valve controls the direction in which the paint is flowing. This valve has two positions:
- Flowing back to the container
- Flowing through the hose and to the gun in normal work position
When starting a project after a long pause, it’s very possible that they will be air inside our device. Before we start working, we need to empty the machine. First we have to make the air flow back and out of the machine. As soon as the material starts to flow out of the equipment, that means the equipment is empty of air. We can now change the valve position to the working mode, so it can flow forward.
Another recommendation is to check that the suction system has enough material and it’s covered with it, especially the filter must be covered by paint. Sometimes it can happen and by working vibrations, the filter goes up a little bit, so it just floats and it’s not submerged.
If there is not enough material to cover the filter, the device won’t work in its best performance. So, please remember to check this too!
The machine does not pump with enough pressure
When the device is working, but it doesn’t pump the material with enough pressure, the problem could be that the valve is damaged.
If the valve is not closing completely or properly, it is possible that some of the paint is escaping through the back hose, and the equipment is then pumping paint in the other direction.
This causes the machine to work unnecessarily, and it can not concentrate its power to pump the material forward. This generates a loss of power when pumping forward. So it’s important to make sure the valve is working properly.
If there is any problem with the valve, the solution is to dismantle, clean it or if damaged replace it for a new one.
Another place you could find some problems is the package. If you see there is some paint floating here from the piston, it is a clear sign that we have problems with our package, or maybe the gasket between piston and package.
It could also be a piston damage, in this case we should open it, replace the package, check the piston, or replace it if it’s also damaged.
The third category in solving problems on our airless electric piston pump devices is:
The equipment is working but not with enough pressure, it does not pump enough material
Why does this happen? It could be that the nozzle is worn out, with a bigger hole in it, which leads to the device not being able to pump material with enough pressure, or maybe the nozzle being used is too big.
Another motive could be that the filter is jammed with paint, avoiding a wide material flow and causing a low pressure. For example, if the suction filter is jammed with paint, and the paint flows just half way, then it’s clear that the paint can not flow with enough pressure.
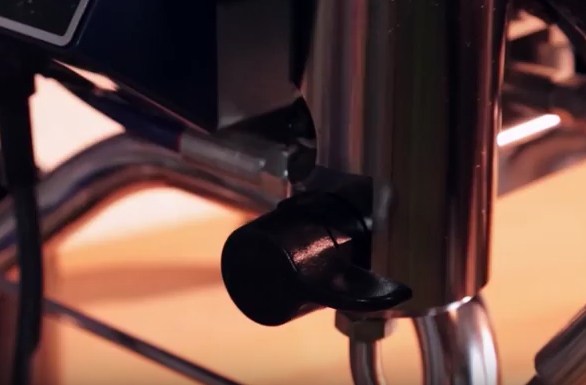
If the intake valve is dirty or is damaged, this will cause some problems for the right use of the machine. Under here you will be able to see the intake valve, and it allows the correct flowing of the material through the machine, but also has to be closed properly so it can create the pressure needed.
Inside the valve there is a small ball. If the ball is dirty, jammed, damaged or the machine hasn’t been cleaned properly, then it is possible that the ball may stick and will not be able to move like it should.
This is the solution: hit it with a hammer, but be careful not too hard! Because you can disassemble the system and one hit will be enough to unstick it. Another way to do it is unscrewing the bottom part to reach the valve base.
Like you can see on the next photo, inside you can find the valve base, with its ball and the ball hood. Putting back together is easy:
- First the valve base.
- Then the ball, it usually sits by itself in its place,
- and after we put the cage above it and we can screw it back.
If there is some paint leftover here, this will make the ball stick to the base and it won’t be able to move up or down.
The solution is to disassemble it and clean it, so the ball can move again up and down, opening and closing the way. We can also clean the cage, so everything can work properly. Now we have disassembled it we can check the ball too and that it’s not broken.
If any of the three parts is broken, deformed or scratched, it would be recommendable to replace it with a new one, so that the system can work properly.
The fourth problem group is:
The device doesn’t spray a proper pattern
One of the reasons may be that we are not using the correct nozzle. It could be too big a nozzle, or a worn out one. If the machine is not spraying properly, then we also should check that we are using the right pressure in the equipment.
You can view the Ultimate Guide to Spray tips here (article) or watch the video (below):
If the pressure is very low, this affects a lot in the way the device is spraying and we won’t get a proper pattern. The pattern won’t be uniform and regular, it will form lines at the edges and in shorter patterns that will make our work more complicated.
On the other hand, if the pressure level is very high, then we will be spraying a lot of material, more than what we actually need and the amount of material will be unnecessarily large. That’s why it is very important to consider always the pressure of our equipment.
Another important point is to use a proper device according to the project. For example, we have here a Graco ST MAX 395, that has a max. performance of 2L/min, which means for example with this equipment it is not possible to spray spackle.
Pay attention to that! Using a proper device according to the material is important! If you don’t consider that, you won’t get the right pattern or performance.
Check out our Ultimate Guide to Spray Tips here.
Your airless device keeps sucking when you let go of the trigger
If your airless equipment keeps sucking even when you let go of the trigger, it could be because a joint of your machine is damaged or dirty.
This will lead to a paint loss which would cause a decompensation of pressure by the machine.
What does this mean?
Let’s start with the theory: When we spray with our airless device at 150 bar, really the paint is being spray at a lot less pressure (let say ay about 130-140 bar). When we stop pressing the trigger on our airless gun, the equipment keeps spraying until equalizing the difference in pressure until the 150 bar.
So if there is leakage of material on any point, your airless machine will interpret that there is still has the same amount of pressure so it will keep spraying.
My airless equipment smothers when you clean it
If your machine smothers when you are cleaning it, it could be because your machine has sucked in air when you changed the paint bucket for water.
So we have presented the most common problems and complications on a electronic piston pump devices and tips to fix your airless machines. If you have any questions or problems about your airless equipment, please, do not hesitate to contact us!
Soon we will solve other problems and clear any questions through posts and videos.
Love our content? You can find more here:
Check out our Airless Discounter YouTube channel
Airless Discounter Instagram account
Questions or queries?
For any further questions or if you would like to get your hands on one of these products seen in this article, you can contact us on +49 (0) 30 220 15436, fill out our contact form or email us. If you wish to purchase one of the products mentioned above, you can check them out in our online store. You can also visit us at our service base during office hours.