Based on our research, the success of home improvement shows, and the raiding of building materials at DIY stores this year, this is truly a Do It Yourself time.
Painting tutorials are flourishing on the Internet, which leads us to write this article to find the best painting tutorial.

Planning your project
First, start by thinking about how you want your project to look, and remember that you’re not limited to four walls or an entire room in the same color.
Consider painting an accent wall in a bold hue or highlighting moldings in a contrasting shade or finish.
And don’t forget to look up and see if the ceiling could use a refresh, too.
The size of the job (a room, a house, a building), its location (interior and/or exterior surfaces) as well as the surfaces to be painted (walls, ceilings, woodwork,…) will tell you what materials you will need to buy and what machines & accessories will be needed.
For simplicity’s sake, we will only talk about painting interior walls and ceilings (as this is the most frequent request we receive from our customers).

Do you have another type of renovation project? You can find detailed information on the following links in our blog:
- Airless Sprayers for Spraying Spackle and Putty
- Spray facade with airless
- Roof Coating with Airless Paint Sprayer
- Top 3 AirCoat Painting Machines for Carpenters and Cabinetmakers
Materials and equipment needed
Assuming your walls are clean and ready to be painted, the choice of materials is fairly simple: a primer and a finishing paint will be essential to paint interior walls and ceilings.
Tips: whether you are a homeowner or a professional, you will get a better quality material and probably a better price by buying directly from a paint manufacturer. Look at what’s available in your area and don’t limit yourself to the big DIY stores.
When choosing an airless paint sprayer and accessories, ask yourself these questions before starting your project:
- What material(s) do you want to spray?
- What type(s) of job do you have?
- What requirements do you expect from the machine?
There are many different airless pumps, so in the following video we have summarized everything you need to know to choose your airless pump. If not, please contact us.
Airless painting tutorial step by step
Now that your surfaces are clean, you have your paints and your airless pump are set, let’s move on to the airless painting tutorial itself. But before you pull the trigger on the gun, there are still a few questions to ask.
How to protect the surfaces and the user?
Everything that needs to be protected (floor, windows, door frames, electrical outlets,…) will need to be camouflaged, either with plastic film, kraft paper, blankets or other cardboard.
This takes a little time but it is a mandatory step to work properly (you must also protect the surfaces by painting with a roller and a brush).

More infos on : How to mask outlets and switches properly ?
For the user himself, a paint overall, a respiratory protection and protective glasses are the basis for working safely and protecting his health.
Preparation of the paint
There are ready-to-use paints, called airless paints. They are generally more expensive than conventional paints.
However, conventional paints can usually be diluted to 5 or 10% maximum to easily pass through the airless gun. So add water or the appropriate solvent and stir with a mixer until you get a nice fluid material.
Paint the walls or ceilings first?
With an airless pump, you do the ceiling last: it is indeed easier to protect the walls with a long plastic sheet than to cover a whole ceiling. This will also avoid splattering on already painted walls.
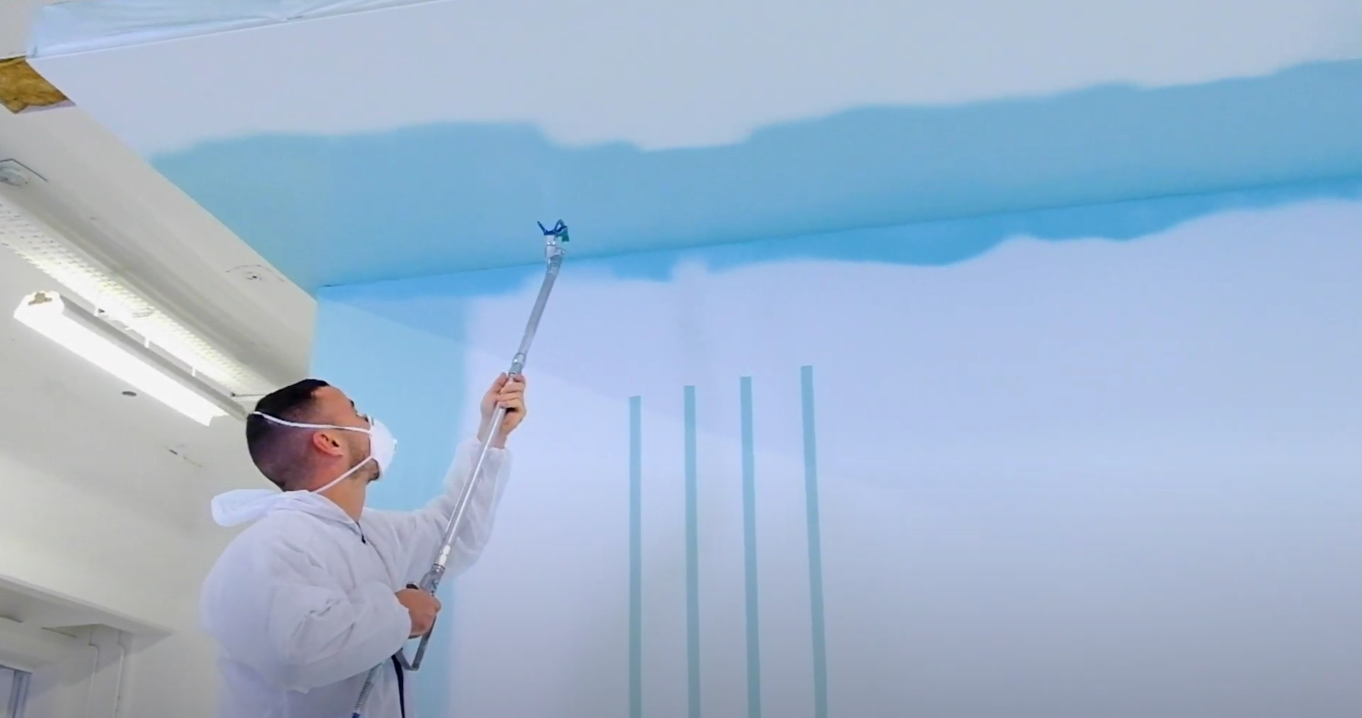
This technique works if you are using two different shades – when you paint everything the same color (white, for example) with the same material, then do the walls and ceilings together wet-on-wet.
Application with airless gun
Before you start spraying your walls, always do a test on a piece of cardboard: this will allow you to know if your settings (nozzle sizes and dilution in particular) are optimal and the spray is uniform.
Once your settings are done, start painting from left to right (or vice versa) from the top. Once the first strip of paint is done, you will do the same thing in the opposite direction.
This will give you a better finish halfway through the overlapping strips and so on until you get to the ground level. And you continue until your wall is completely painted.

An example of overlapping 50 – 50 passes
Remember the main points to always observe when using an airless gun:
- Adopt the right speed
- Have the right spray angle
- Observe the right distance from the wall
- Start spraying when the arm is already moving
It sounds easy on paper, yet there are a lot of practical accessories and techniques for airless spraying. And if you’d rather watch a video on the subject, you can see the basics of getting started with an airless sprayer in this video from Wagner Contractor.
Cleaning of the site and work tools
For clean lines and precise edges, masking tape is a must. Tape provides professional results, but if left in place for an extended period of time, the paint can flake off when it is removed.
Do you know how to properly remove the tape after the job is done without tearing it off? The trick is to let the paint dry completely, then score the edge of the tape with a putty knife before removing it. This will break up any adhesion that has formed with the paint and ensure that the tape will come off cleanly without damaging your paint job.
Find more useful info on this here, as well as our low cost Airless Discounter tapes.
Cleaning the pump and its accessories is the other essential step you can’t avoid. Don’t panic, cleaning and storing an airless machine only takes a few minutes with the right method.
On our Youtube channel, we show you in detail how to properly clean and rinse your airless pump:
What next?
Air your interior for a few days – most water-based paints do not smell as strongly as glycerol paints, but there is still a certain percentage of Volatile Organic Compounds (=VOCs) in modern paints.
Moreover, the paint remains and the used accessories are not disposed of in the sewers or in the domestic garbage. Please take into account the information about recycling and storage of paints.
Now that everything is finally finished, you can contemplate the fruit of your work with satisfaction and why not send us some photos of your airless painting job!
Love our content ? You can find more here:
Check out our Airless Discounter YouTube channel
Airless Discounter Instagram account
Questions or queries ?
For any further questions or if you would like to get your hands on one of these products seen in this article, you can contact us on +49 (0) 30 220 15436, fill out our contact form or email us.
If you wish to purchase one of the products mentioned above, you can check them out in our online store.
You can also visit us at our service base during office hours.